Radar Operation
Driving the set: display modes, stabilization, controls, and plotting tools. (Pub 1310 Ch.2)
1 · Relative motion vs true motion
Two display schools of thought, with very different mental models:
- Relative motion (RM) — your ship sits at the center of the screen and stays there. Everything else moves on the display, but the motion you see is relative: a ship steaming with you on a parallel course shows zero relative motion (just a bright dot). A buoy you're passing appears to move because your motion translates into apparent buoy motion.
- True motion (TM) — your ship's symbol drifts across the screen at your actual course and speed; stationary targets stay still on screen; other moving ships paint at their actual courses and speeds. Closer to a chart-like view.
RM is what's used for collision-avoidance plotting because the math (CPA, course-to-pass) is built around what your screen is actually showing you. TM is more intuitive for navigation. Most modern radars let you flip between them.
2 · Display orientations
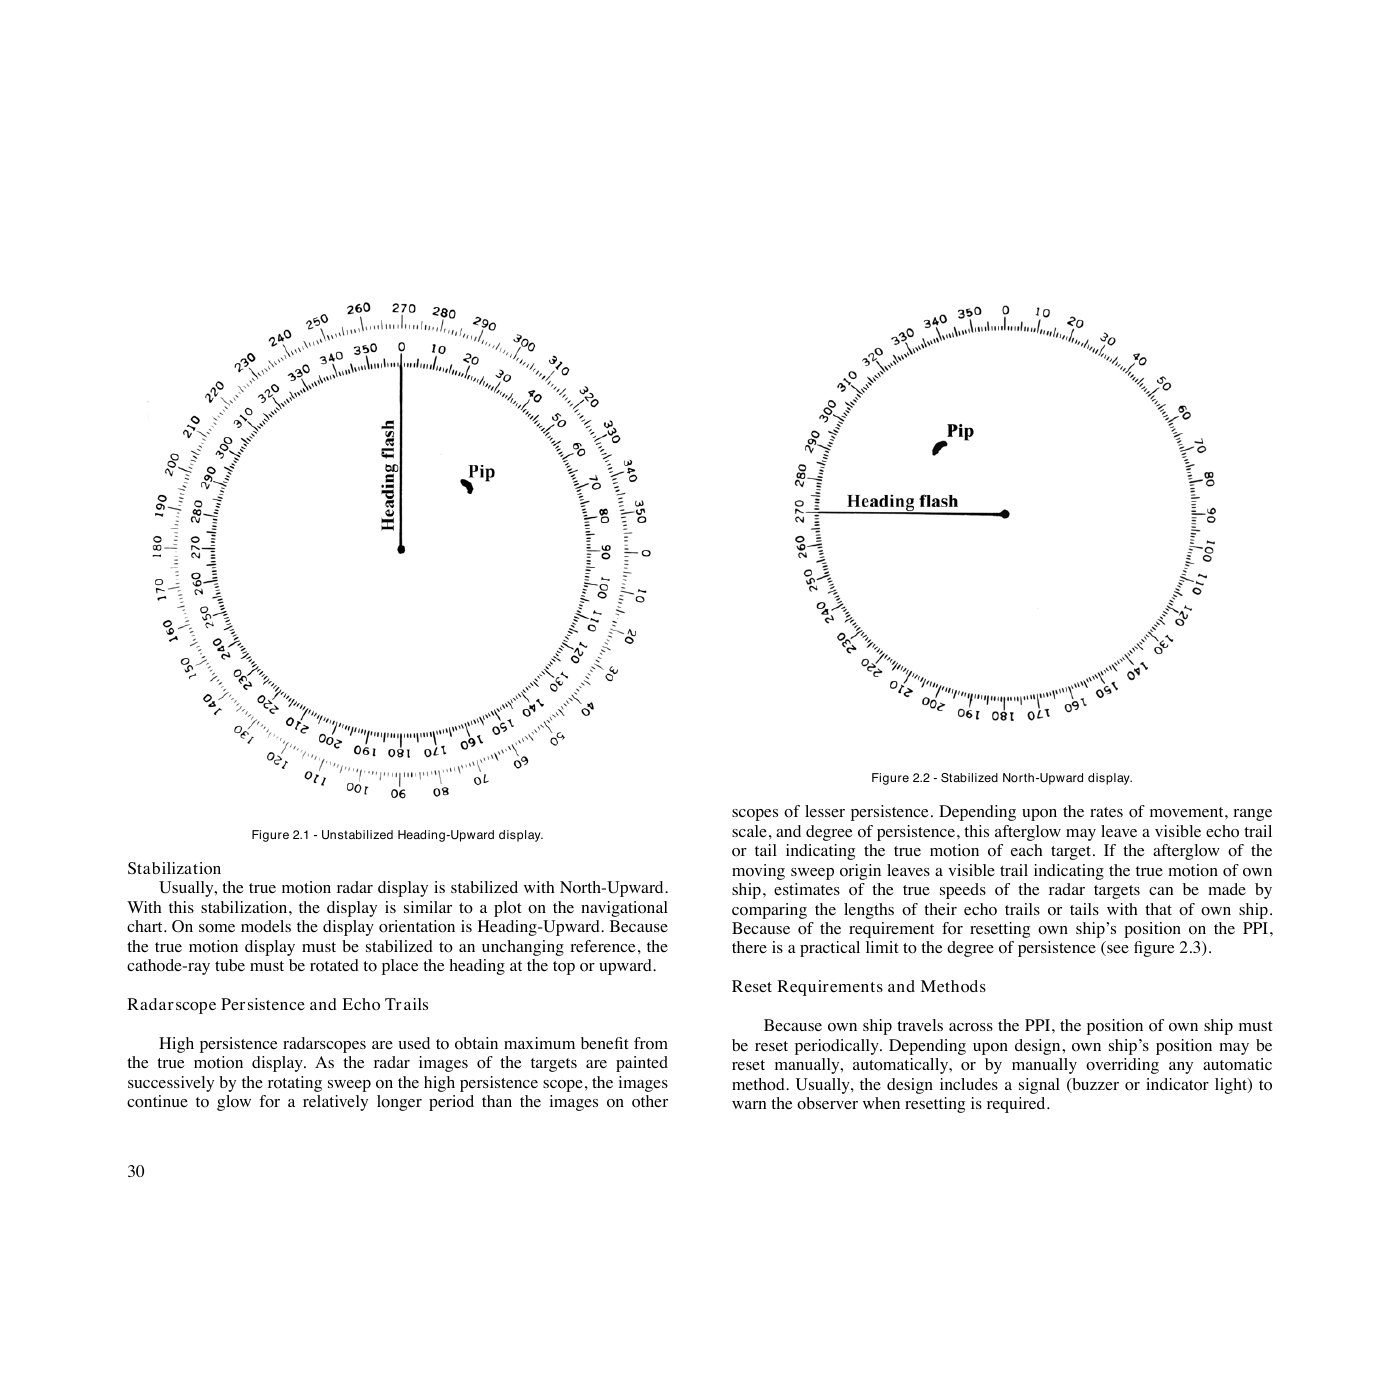
- Head-up — the heading flash points to the top of the screen. Simple, but the picture rotates as you yaw, which is disorienting.
- Course-up — your intended course is to the top. Stays still as you yaw; great for steady passages.
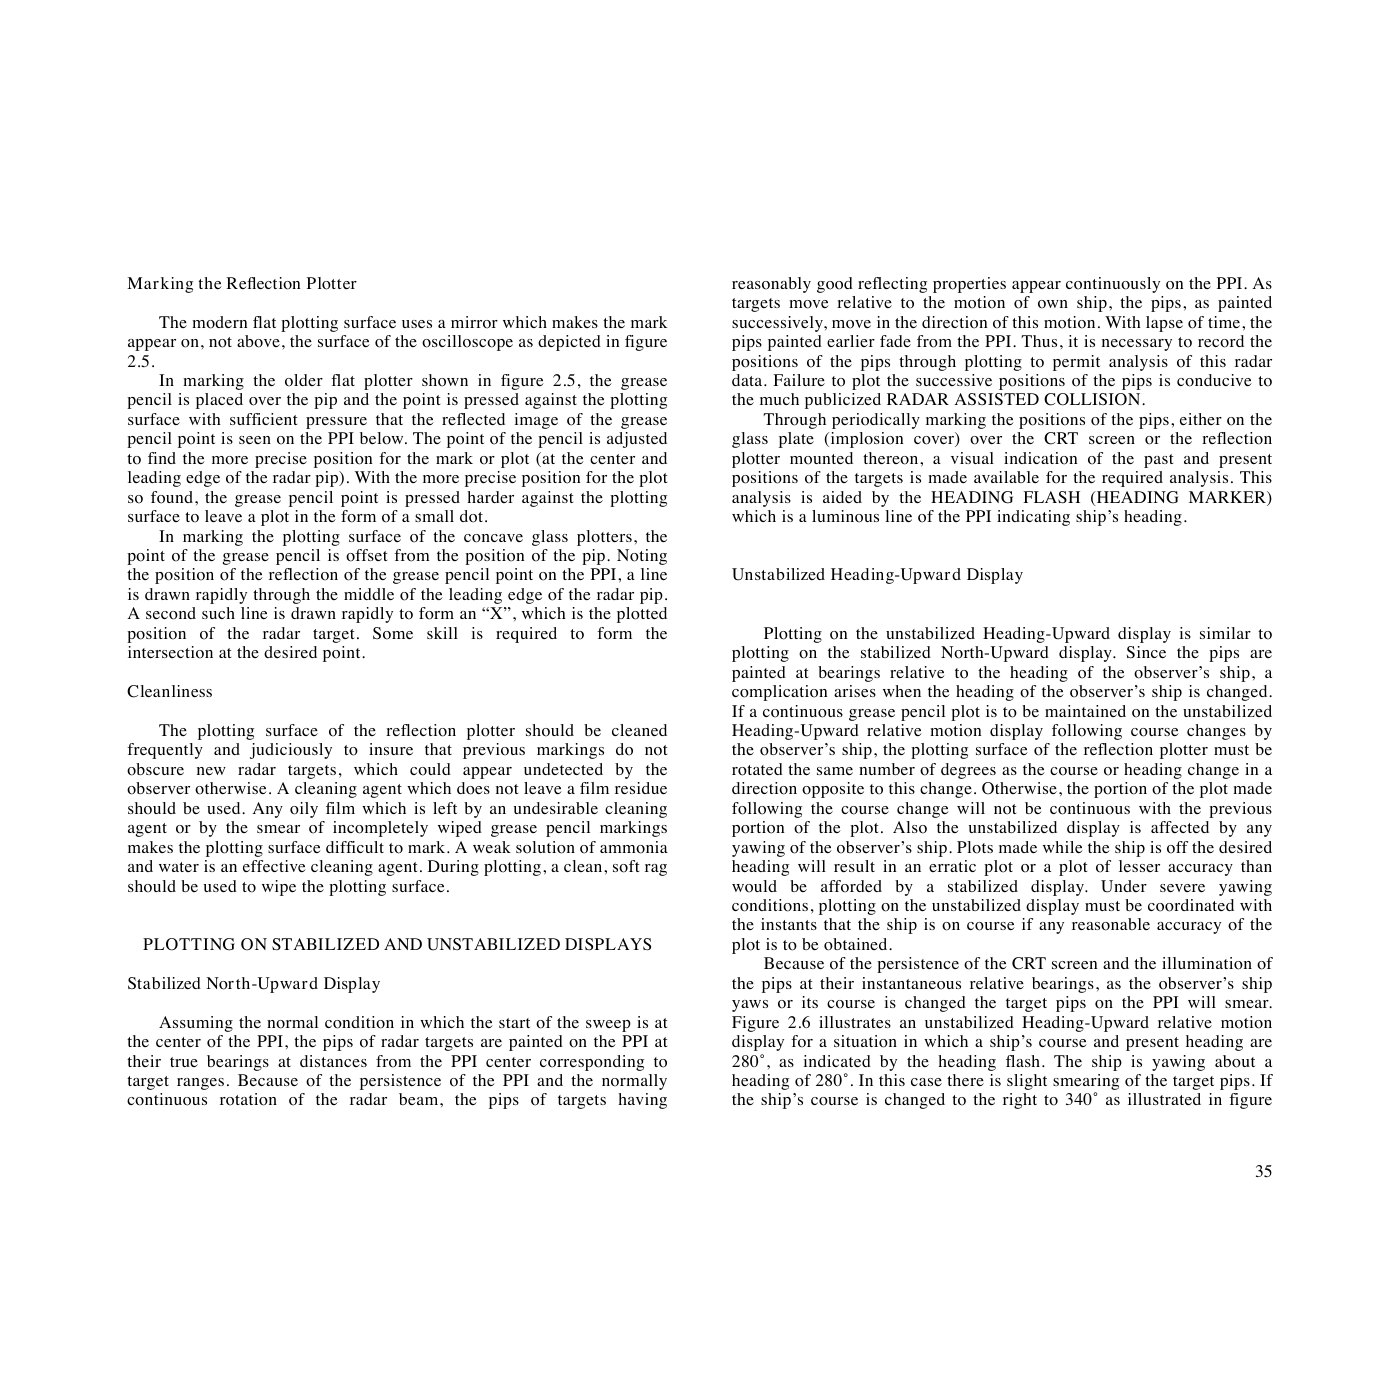
- North-up — true (or magnetic) north is to the top. Best for matching the chart and for plotting bearings.
"Stabilized" means the radar uses a heading sensor (gyro or fluxgate) so the display orientation stays correct as you swing. Unstabilized head-up is fine for short coastal hops; stabilized north-up is the working configuration for any serious plot.
3 · Plotting on the PPI
On older radars without ARPA tracking, you'd plot target positions by hand — typically with a grease pencil on a transparent reflection plotter overlaid on the screen. Successive marks at known time intervals build a track.
The two key measurements:
- Range — read off the variable range marker (VRM, a rotating circle) or the fixed range rings (typically every 1, 2, or 5 nm depending on scale).
- Bearing — read off the electronic bearing line (EBL, a rotating cursor line) or the mechanical bearing cursor.
4 · Power and tuning
- Indicator power — turns the display on. The set warms up for ~3 minutes before the magnetron is ready.
- Antenna power — separate switch on most sets so you can have the screen on while leaving the antenna stopped (e.g. at anchor with crew on deck).
- Brilliance — overall display brightness. Set so the trace is just visible against the screen background.
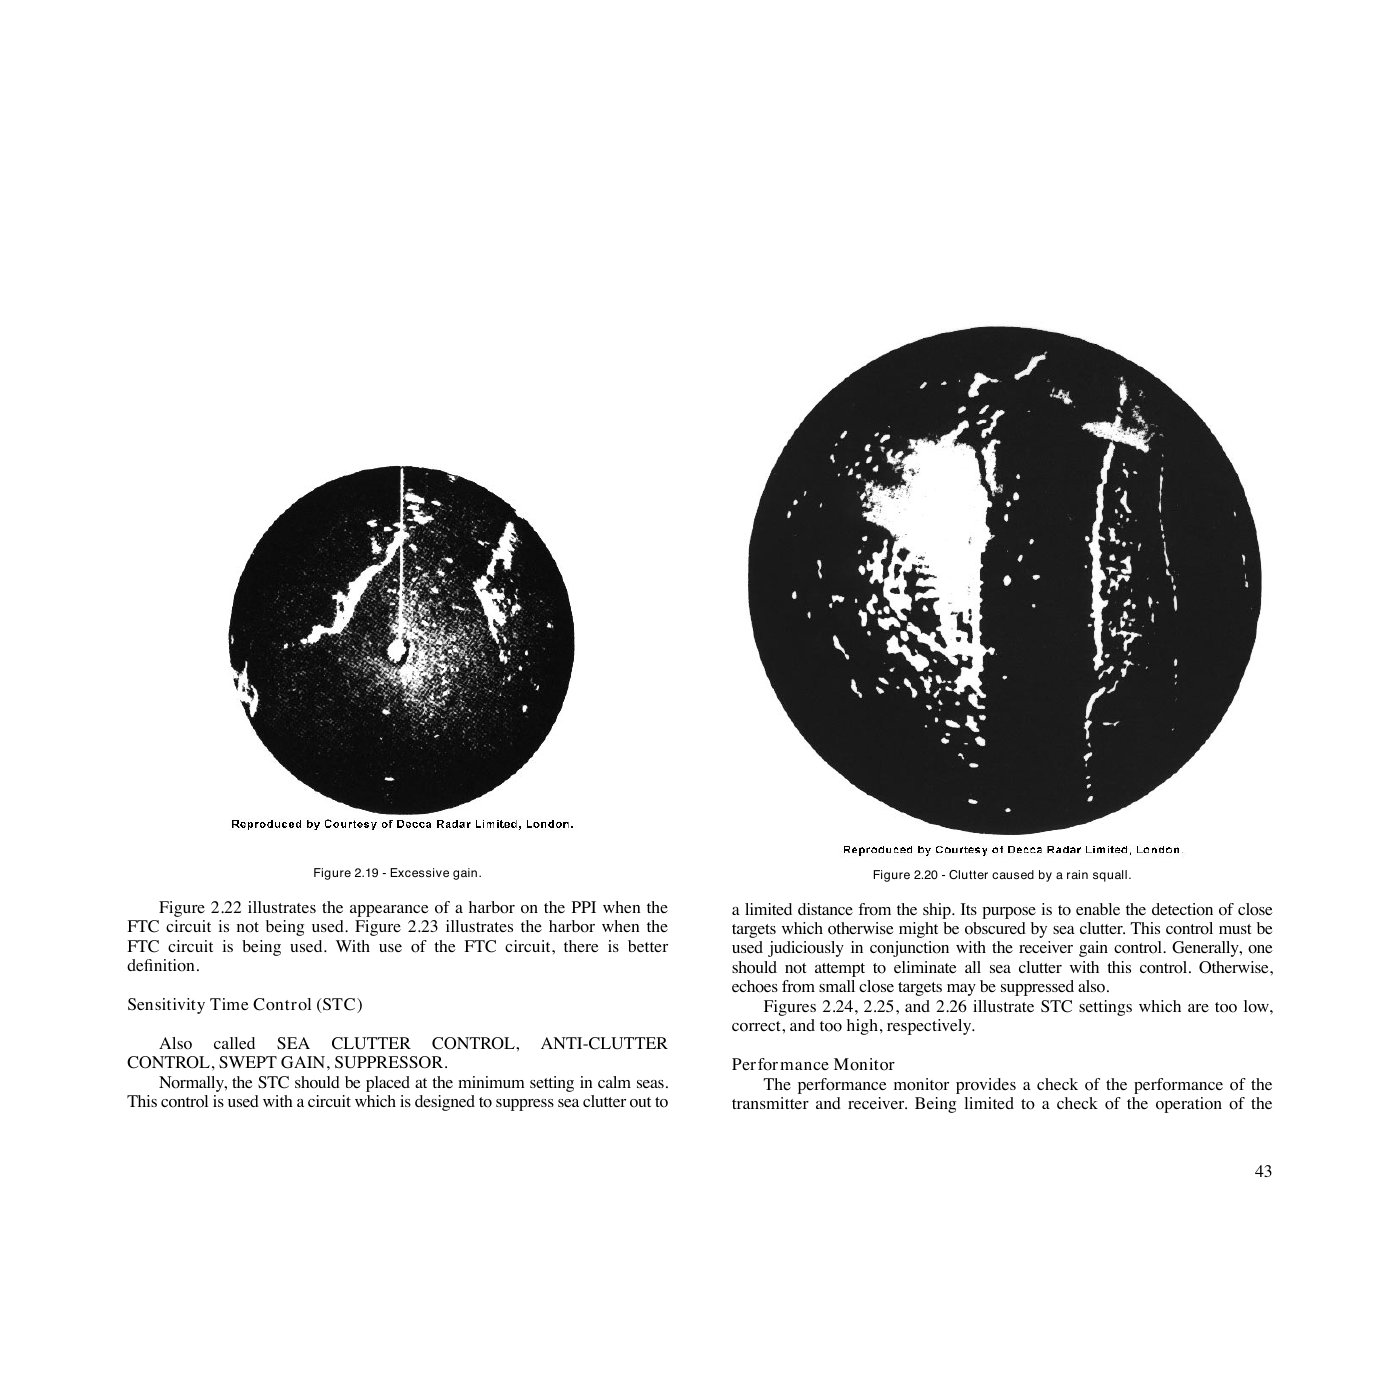
- Receiver gain — like a volume knob for the receiver. Too low: weak targets disappear. Too high: noise speckle floods the screen.
- Tuning — fine-adjusts the receiver to the transmitter's actual frequency. Modern sets auto-tune; on older sets, peak the tuning indicator while pointed at a known target.
5 · Clutter controls
Two controls deal with two different kinds of unwanted echoes:
- STC (Sensitivity Time Control) / Sea Clutter — reduces gain at close range, where wind-built waves return strongly. Modern auto-STC works for most sea states; manually, advance the knob just enough that the close-range speckle is suppressed without losing real targets. Too much STC and you'll miss small inshore targets.
- FTC (Fast Time Constant) / Rain Clutter — differentiates the receiver signal so only the leading edge of large echoes is shown. A rain squall, instead of painting as a solid blob, paints as a thin outline — and ships within or behind it become visible again. Costs you some return on small or weak targets.
Both controls trade signal for clarity. The discipline: use the minimum needed for current conditions, recheck whenever the weather changes. A common bug is leaving sea-clutter wound up after dawn when the wind drops — you'll miss inshore traffic.
6 · Range scales
Most marine radars offer scales from ¼ nm out to 24 or 48 nm. The scale you pick changes the pulse length and PRR automatically:
- Long range (12–48 nm) — long pulse, low PRR. Better for detecting big targets at distance, weak at resolving close detail.
- Medium (3–6 nm) — the workhorse for offshore collision avoidance.
- Short (¼–1.5 nm) — short pulse, high PRR. Best for harbor approach, tracking close traffic, and parallel-index work.
A common discipline is to flip scales every few minutes: zoom out to verify there's nothing approaching from afar, zoom back in for accurate plotting on the contact you're watching. Modern dual-display sets show two scales simultaneously, removing the need to flip.
7 · Off-center and expanded-center displays
On a standard PPI, your ship is at center and you can see equally in all directions. Two variants extend that:
- Off-center — your ship shifted to one edge so you see further ahead. Useful when transiting a narrow channel and the picture-behind-you is irrelevant.
- Expanded center — magnifies a region near the center for more detail close-in.
Practical takeaways
- Working configuration for offshore collision avoidance: relative motion, north-up, stabilized, 6 nm range scale.
- Working configuration for harbor approach: true motion, course-up, stabilized, ¾–1½ nm range scale.
- Re-tune after starting a long passage — the magnetron drifts as it warms up to operating temperature.
- Practice flipping ranges. Train the reflex of "every 3 minutes, flip out to 12 nm and back" so you never miss a fast contact entering your bubble.